Now that you have learned the basics of Git in the earlier post, in Git for Absolute Beginners, we will help you raise your bar to the advanced level. In this sequel to the previous blog, we discover Git’s workflow and some of its key operations.
As usual, we can start with a case study. You are a project lead for a project that uses Git as its VCS, and you get a client requirement to develop two new features for the project.
You have created two teams to handle each feature as you plan everything. For instance, Team A will take two weeks to complete, and Team B will take three weeks to complete and develop features.
To tackle such situations, Git uses branches.
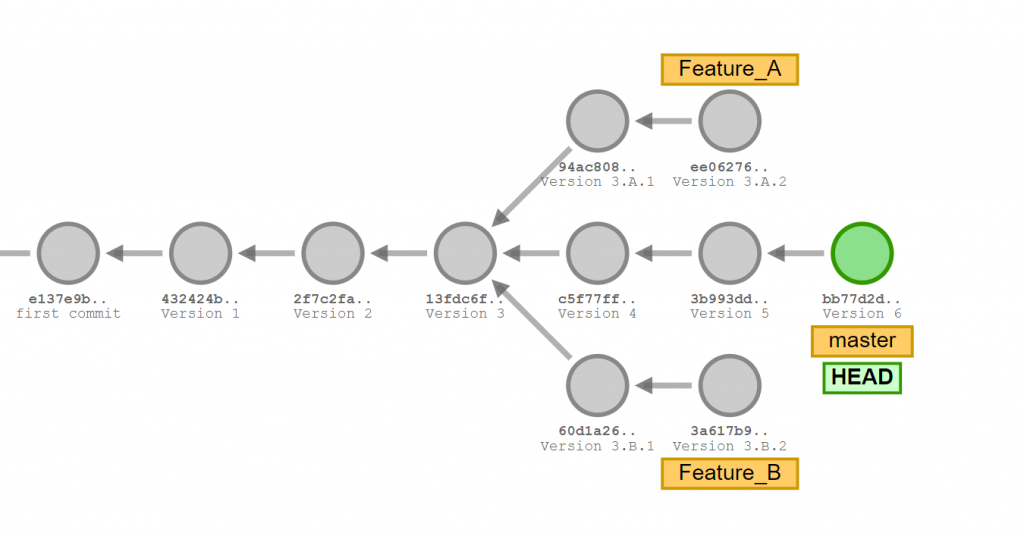
Here is a representation of the git branch, as per our requirement; as you can see in the above figure, it has a central line representing the stable main branch (here named master). Usually, this branch goes to production and can be accessed by users.
Care should be taken with the Main or Master branch as this contains the version with least bug and any release to this branch should be done with proper care and testing.
Now, just above the master branch (in the picture), we can see the Feature A branch, which was developed by Team A. The circles denote the new changes made by Team A to implement Feature A.
As you can see, these changes will not be visible in the master branch. Similarly, below the Master branch, we can see the Feature B branch which contains the code of Team B for Feature B, and it is not visible to Team A and the Master branch.
As in the above example, Team A and Team B can develop the features independently, with no confusion regarding the code changes as both codes are isolated via branches.
When the features are complete, the QA team can also test them separately, as one branch does not have any relation to the other feature.
Once the features are completed, you can merge the branch back into the master branch, i.e. after all testing and QA, we can release it to the users. You can do it easily by using the git branches.
If any problem arises with one of the features (like system incompatibility or incompatible with any previous essential feature of the project), you can simply remove this branch as the development is independent from the stable version this will ensure the code safety.
Git Branching means diverging from the mainline of development and continuing to work separately without affecting the main codebase.
Each branch represents a separate line of development. You can work on features, bug fixes, or experiments without impacting the main branch.
Parallel development: Several team members can work on different branches at a time.
Testing and experimentation: Create branches to test changes or try out new ideas without affecting the stable codebase.
Versioning and release management: Branches allow maintaining different versions of the project.
Reduced Risk of Breaking the Main Code: By working in branches, developers minimize the risk of introducing bugs.
Use the following command to create a new git branch:
$ git branch <branch-name>
It creates a new branch with the name you give. After creating a new branch, you can change it with the above command.
$ git checkout <branch-name>
Alternatively, you can create and switch to a branch by specifying
$ git checkout –b <branch-name>
Use the following command for listing all the branches in the git repository:
$ git branch or git branch –list
For deleting a branch, you can use:
$ git branch -d <branch-name>
As the project progresses, you must check and verify the features your teams have developed (since you are the team lead). In the case of git, the whole repository will be available to you (as git is a distributed version control system).
Git checkout facilitates switching between branches and versions.
One of the relevant aspects of git checkout is the Head, Head is version which is checked out by you.
When you are at the master branch, the head is by default the latest version (or commit) of master branch itself. Also, sometimes there arises a situation where the head is not the latest commit of the branch. This situation is known as detached head.
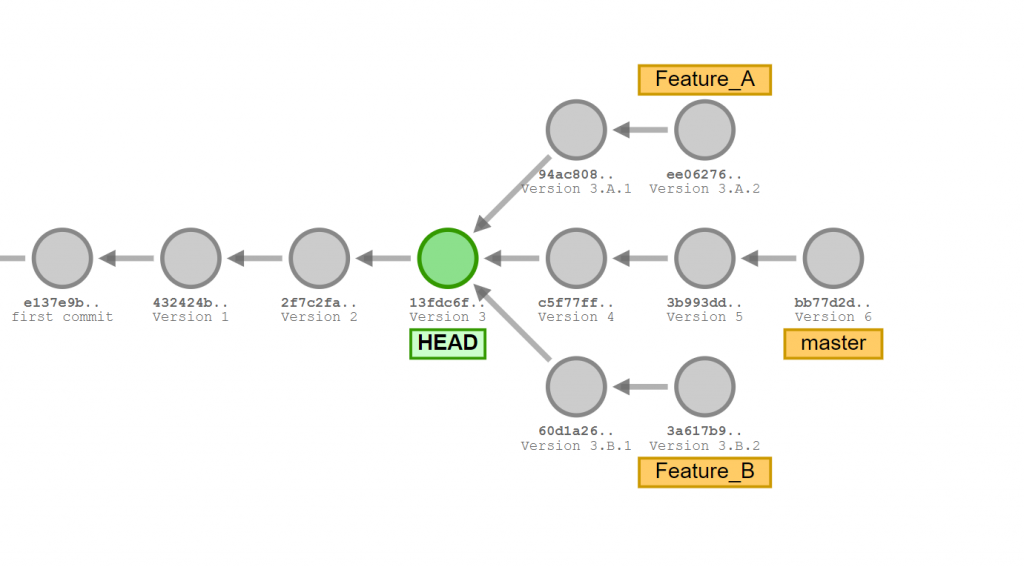
Detached head usually happens when we check out any other version.
As time passes, Feature A is finally completed and tested by QA. Now you can release it into the stable version of the project. With the help of Git Merge, you can effortlessly implement this.
Using Git merge, you can combine changes from two or more branches into a single branch.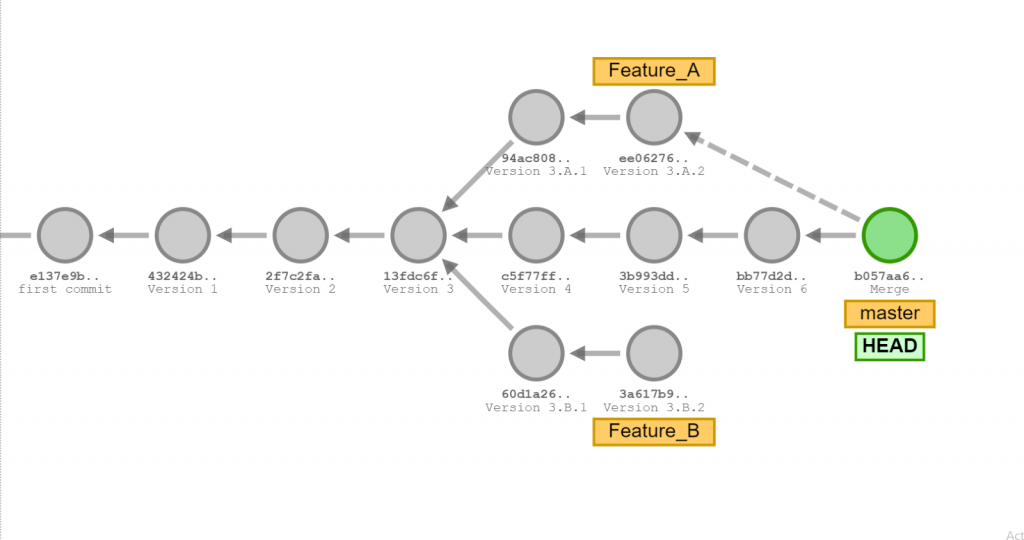
As shown in the above picture Feature A is merged into the master branch and a commit (or version) is created in the master branch. All the changes in Feature A branch are migrated or integrated to the master branch.
There are two fundamental types of merging in Git.
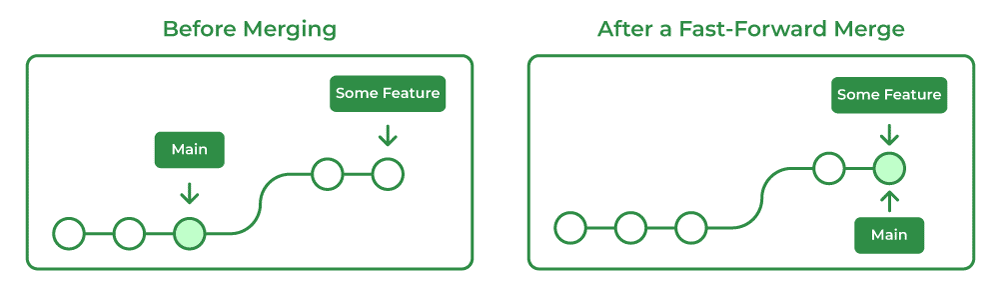
This happens when the tip of the current branch is a direct ancestor of the target branch. You can refer the above picture which forms a classic example of fast forward merge.
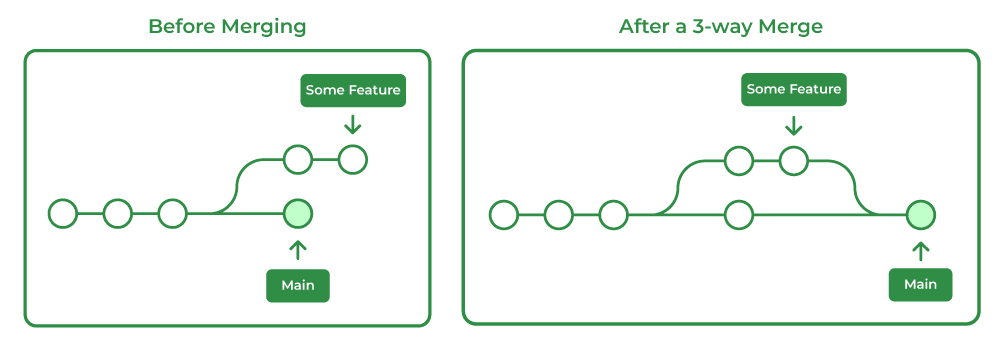
This type of merging happens when the base branch changes. Git creates a fresh merging commit with the modifications from both branches. Using the three-way merge process, Git makes comparisons regarding the modifications in both branches in accordance with the base branch.
In our case, Feature A is compared with master branch and all the changes are incorporated to master branch by creating a new commit in master branch.

Typically, merge conflict happens while attempting to merge two separate branches where they contain different changes in the same locations, inside the same file.
Let me explain with our example, after developing and releasing a feature, it gets usually added to the release documents of the project. Therefore, after developing the Feature A, team A will update its release documents when merged to main branch. Let’s assume that it is the 5th point in the release document, this change will not be present in Feature B branch.
The same will be done after Team B completes Feature B, but when adding the release notes, it will be the 5th point in the release (since Feature A notes are not present in the Feature B branch).
Now when merging the branch there will be a conflict for git, in the main branch Feature A release note is the 5th point but according to Feature B the 5th point is its release note. This is called a merge conflict.

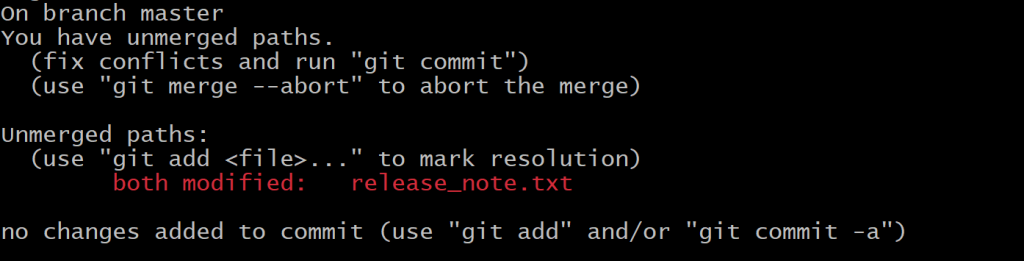

When a merge conflict arises, we must decide how the changes should be made.
In the above case, we can make Feature B release as 6th point and add the change to the project. After the conflict is resolved a new commit gets created.
It is yet another tool for migrating changes from one branch to another.
Rebasing involves taking one branch and adding it to the tip of another branch. Unlike merging, which creates a merge commit to combine changes, rebase works by moving or “replaying” commits from one branch onto another branch, effectively rewriting the commit history.
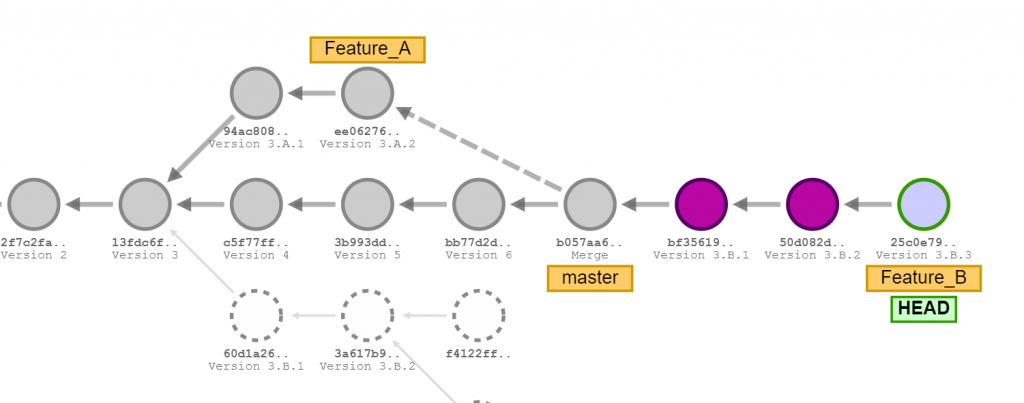
The figure shows the result after rebasing Feature B branch to master Branch.
Choose the Base Branch: You start by selecting the branch you want to rebase onto
Start the Rebase: With the base branch checked out, you initiate the rebase command
$ git rebase <branch-to-rebase-on>
Git Identifies Divergent Commits: It identifies the commits unique to the source branch that need to be applied to the base branch.
Commits are “Replayed”, or the same changes are made by git.
Resolution of Conflicts (if any): resolve the conflicts in each affected file, mark them as resolved, and continue the rebase process.
Finishing the Rebase: Once all commits have been successfully applied, Git completes the rebase
The HEAD of the base branch is updated to point to the most recent commit that was just replayed.
Cleaner History: Rebasing creates a cleaner commit history than merging.
Integration with Remote Branches: Use rebasing to ensure your commits apply cleanly on a remote branch (e.g., when contributing to an external project).
Snapshot Consistency: The final snapshot after rebasing is the same as the one after merging; only the history differs.
This command allows you to selectively apply commits from one branch to another.
This scenario usually arises when you want to take a hotfix from one branch or to adopt improvements in common functionalities (like a new data structure developed internally).
While git cherry-pick is handy, it’s not always the best practice. Traditional merges are preferred in many cases.
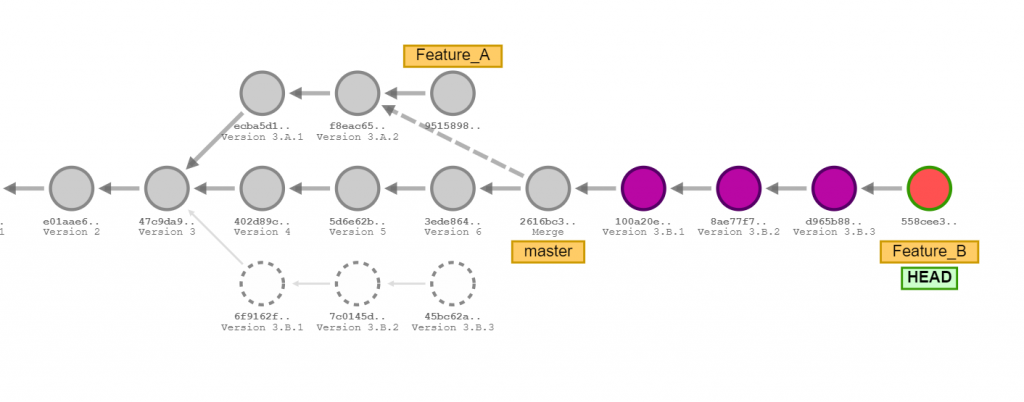
Commit from Feature A branch is now cherry picked to Feature B Branch (the one shown in the red color).
You can implement Cherry-pick by executing the following command
$ git cherry-pick <commit-id>
Git can handle changes in code and is useful for collaborating with others. But how do you mark specific versions of your project for future reference? This is where Git tagging comes in.
Think of Git tags as bookmarks for your project’s history. They point to specific commits, allowing you to easily revisit that state of your codebase. Tags are like labels that provide a clear and memorable name for an important point in development.
Capture Points in History: Tags serve as snapshots, freezing a specific moment in your code’s evolution. Unlike branches, tags remain static and aren’t affected by future commits or changes.
Release Points: People often use tags to mark significant releases (e.g., v1.0, v2.0).
There are two main types of tags in Git:
Lightweight Tags: These are simple references that point directly to a specific commit. They are lightweight because they don’t store any extra information.
Annotated Tags: These are more informative tags that store additional data like the tagger’s name, date, and a tag message. This information could be helpful for future references.
To create a lightweight tag:
$ git tag <tag_name> <commit_hash>
Use the following command to create an annotated tag using a message.
$ git tag -a <tag_name> -m “<message>” <commit_hash>
To list all tags in your repository
$ git tag
To delete a tag
$ git tag -d <tag_name>
Remember: Tags are immutable, meaning you cannot change them once created. They simply point to a specific commit in history.
In conclusion, Git’s robust branching and merging features, along with cherry-picking, rebasing, and tagging, empower you to efficiently manage your codebase. By mastering these techniques, you can collaborate seamlessly, track project history, and maintain a clear understanding of your code’s evolution.
Whether you’re a seasoned developer or just beginning your Git journey, effectively utilizing these functionalities will streamline your web application development and mobile application development processes to ensure a well-organized and collaborative development environment.
Discuss your application development needs with ThinkPalm and our technical team will help you get started! 
Pavan Sunny Thomas is a Java Full Stack Developer with expertise in developing and maintaining Java-based web applications using Spring Boot, Hibernate, Angular, and other technologies. He is passionate about web development and enjoys learning new skills and tools. Also, an avid blogger, Pavan shares his insights and tips on web development and showcases his portfolio of projects.